The smokey eye is a timeless makeup look that exudes glamour and sophistication. While it may seem daunting at first, with the right techniques and a bit of practice, anyone can achieve this sultry, eye-catching style. In this comprehensive guide, we’ll walk you through the steps to create a stunning smokey eye, perfect for beginners looking to elevate their makeup game.
Whether you’re preparing for a night out or simply want to experiment with a bold new look, this tutorial will equip you with the knowledge and skills to confidently rock a smokey eye. From selecting the right tools and products to mastering the art of blending, we’ve got you covered. So, let’s dive in and unlock the secrets to achieving that coveted smoldering gaze!
Essential Tools and Products
Before we begin our smokey eye journey, it’s crucial to gather the right tools and products. Having the proper equipment will make the application process smoother and help you achieve a more polished result.
Brushes
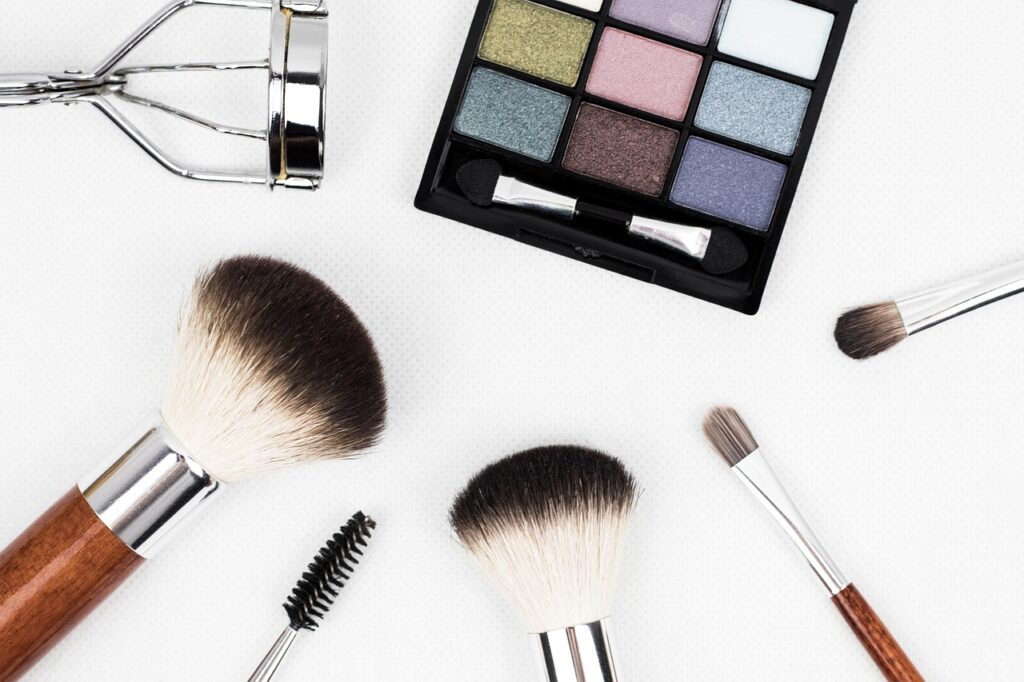
A set of quality brushes is indispensable for creating a flawless smokey eye. Here are the essential brushes you’ll need:
- Fluffy blending brush: This brush is perfect for softening harsh lines and creating seamless transitions between colors.
- Flat shader brush: Use this to pack color onto the lid and for precise application in smaller areas.
- Pencil brush: Ideal for smudging eyeshadow along the lash line and for detailed work in the outer corners.
- Angled eyeliner brush: Great for applying gel eyeliner or creating sharp winged looks.
Investing in a good brush set will make a world of difference in your makeup application. Look for brushes with soft, dense bristles that pick up and distribute product evenly.
Eyeshadows
For a classic smokey eye, you’ll want to have a palette with a range of neutral shades. Here’s what to look for:
- Base shade: A light, matte color similar to your skin tone
- Transition shade: A medium-toned matte color, usually a warm brown
- Crease shade: A darker matte shade for depth
- Lid shade: A shimmery or metallic shade for the center of the lid
- Darkest shade: A deep matte black or charcoal for intensity
Choose high-quality eyeshadows with good pigmentation and blendability. This will make it easier to achieve a seamless, professional-looking result.
Other Essential Products
To complete your smokey eye look, you’ll also need:
- Eye primer or concealer
- Eyeliner (pencil and/or liquid)
- Mascara
- False lashes (optional)
- Makeup setting spray
Having these products on hand will ensure you have everything you need to create a long-lasting, impactful smokey eye.
Prepping the Eyes
Proper preparation is key to achieving a flawless smokey eye that lasts all day (or night). Follow these steps to create the perfect canvas for your eye makeup:
Cleansing and Moisturizing
Start with clean, moisturized skin. Gently cleanse your face, paying special attention to the eye area. Remove any traces of old makeup or oils that could interfere with the application of your new look.
After cleansing, apply a lightweight eye cream to hydrate the delicate skin around your eyes. This will help prevent creasing and ensure smooth application of your eyeshadow.
Priming the Lids
Applying an eye primer is a crucial step that many beginners overlook. Primer creates a smooth base for your eyeshadow, intensifies the color payoff, and helps your makeup stay put for hours. Here’s how to prime your lids effectively:
- Choose a primer that matches your skin tone or opt for a transparent one.
- Apply a small amount of primer to your entire eyelid, from lash line to brow bone.
- Gently pat the primer into your skin using your ring finger or a small, flat brush.
- Allow the primer to set for about 30 seconds before moving on to eyeshadow application.
If you don’t have a dedicated eye primer, you can use a small amount of concealer as an alternative. Set the concealer with a light dusting of translucent powder to prevent creasing.
Color Correcting (Optional)
If you have dark circles or discoloration around your eyes, you may want to color correct before applying your smokey eye makeup. Use a peach or orange-toned corrector to neutralize blue or purple undertones. Gently pat the corrector onto the affected areas and blend well.
By taking the time to properly prep your eyes, you’re setting yourself up for success and ensuring that your smokey eye look will be long-lasting and flawless.
Building the Base
Now that your eyes are prepped and ready, it’s time to start building the foundation of your smokey eye look. This step is crucial for creating a smooth gradient and ensuring that your darker shades blend seamlessly.
Applying the Base Shade
Begin by selecting a light, matte eyeshadow that closely matches your skin tone. This will act as your base shade. Using your fluffy blending brush, apply this color all over your eyelid, from lash line to brow bone. This creates a uniform canvas and helps subsequent colors blend more easily.
Tips for applying the base shade:
- Use gentle, sweeping motions to distribute the color evenly
- Build up the intensity gradually, starting with a light layer and adding more if needed
- Ensure the color is well-blended, with no harsh lines or patches
Creating Depth with the Transition Shade
Next, choose a medium-toned matte shade, typically a warm brown, to act as your transition color. This shade will help create a seamless blend between your base and darker colors.
Using your fluffy blending brush:
- Apply the transition shade to your crease, focusing on the outer corner of your eye
- Use small, circular motions to blend the color upwards and outwards
- Gradually build up the intensity, being careful not to overdo it
- Extend the color slightly beyond your natural crease to create the illusion of depth
Remember, the key to a successful smokey eye is blending, blending, and more blending! Take your time with this step to ensure a smooth transition between colors.
Defining the Crease
To add more definition to your eye look, use a darker matte shade in your crease. This step helps create the signature smokey effect and adds depth to your eye makeup.
Using a smaller, more precise blending brush:
- Apply the darker shade to the outer corner of your eye and into the crease
- Use small, back-and-forth motions to blend the color inwards, stopping about halfway across your eyelid
- Build up the intensity gradually, focusing on the outer corner for a more dramatic effect
- Blend well to soften any harsh lines and create a seamless transition with your transition shade
By carefully building up these base layers, you’re creating a strong foundation for the rest of your smokey eye look. Take your time with each step, and don’t be afraid to go back and blend more if needed.
Adding Intensity
With your base layers in place, it’s time to amp up the drama and create that signature smokey effect. This is where your look really starts to come together, so take your time and enjoy the process!
Darkening the Outer Corner
To create depth and dimension, we’ll focus on darkening the outer corner of the eye. This step is crucial for achieving that sultry, smoldering look.
- Choose your darkest matte shade (usually a deep brown, charcoal, or black).
- Using a small, dense brush, apply this shade to the outer V of your eye.
- Start with a small amount of product and build up gradually.
- Blend the color inwards along your crease, stopping about halfway across your lid.
- Use a clean blending brush to soften any harsh lines and create a seamless transition.
Remember, it’s always easier to add more color than to remove excess, so start light and build up intensity as needed.
Defining the Lash Line
To further enhance the smokey effect, we’ll bring some of that darkness down to the lash line.
- Using a pencil brush or a smudge brush, take your darkest shade and run it along your upper lash line.
- Extend this color slightly beyond the outer corner of your eye for an elongated effect.
- Smudge the line gently to soften it and blend it with the rest of your eyeshadow.
- Repeat this process on your lower lash line, focusing mainly on the outer third for a balanced look.
This step helps to frame your eyes and create that coveted smokey effect.
Adding a Pop of Shimmer (Optional)
While a classic smokey eye is often matte, adding a touch of shimmer can elevate your look and make your eyes pop.
- Choose a shimmery or metallic shade that complements your overall color scheme.
- Using your finger or a flat shader brush, pat this shade onto the center of your lid.
- Be careful not to blend too much, as you want the shimmer to stand out.
- For extra sparkle, you can add a tiny bit of this shade to your inner corner as well.
This step adds dimension and light to your smokey eye, preventing it from looking flat or one-dimensional.
Perfecting the Blend
The key to a flawless smokey eye lies in the blend. Proper blending ensures a seamless transition between colors and eliminates any harsh lines. Let’s explore some techniques to perfect your blending skills.
Circular Blending Technique
One of the most effective ways to blend eyeshadow is using small, circular motions. This technique helps to diffuse the color and create a soft, airbrushed effect.
- Hold your blending brush lightly at the end of the handle for more control.
- Using gentle pressure, make small circles with the brush where two colors meet.
- Gradually increase the size of your circles to further blend the colors.
- Continue this motion until you achieve a seamless gradient between shades.
Remember to use a light hand – you can always add more pressure if needed, but it’s harder to correct over-blending.
Windshield Wiper Method
Another useful blending technique is the windshield wiper method. This works particularly well for blending colors in the crease.
- Hold your blending brush horizontally against your eye.
- Using back-and-forth motions (like a windshield wiper), blend the colors in your crease.
- Start with short, controlled movements and gradually increase the length of your strokes.
- Adjust the pressure and speed of your movements to achieve the desired blend.
This technique helps to distribute color evenly across the crease and create a smooth transition between shades.
Layering for Seamless Transitions
Sometimes, despite your best efforts, you might find that two colors aren’t blending as smoothly as you’d like. In these cases, layering can be your secret weapon.
- Choose an eyeshadow shade that’s in between the two colors you’re trying to blend.
- Apply this intermediate shade where the two colors meet.
- Use your blending brush to softly diffuse this new color into both the lighter and darker shades.
- Repeat if necessary, using progressively lighter or darker shades to create a perfect gradient.
This technique can help you achieve a truly seamless blend, even with dramatically different colors.
Eyeliner Application
Eyeliner plays a crucial role in defining and enhancing your smokey eye look. Whether you prefer a subtle line or a bold wing, mastering eyeliner application can take your makeup to the next level.
Choosing the Right Eyeliner
For a classic smokey eye, you have several eyeliner options:
- Pencil eyeliner: Easy to apply and smudge, perfect for beginners.
- Gel eyeliner: Offers precision and staying power, great for creating sharp lines.
- Liquid eyeliner: Ideal for creating crisp, defined lines and dramatic wings.
Choose the type that you’re most comfortable with, or experiment with different formulas to find your favorite.
Tight-lining Technique
Tight-lining, or applying eyeliner to your upper waterline, can make your lashes appear fuller and add intensity to your smokey eye.
- Gently lift your upper eyelid to expose the waterline.
- Using a waterproof pencil liner, carefully apply the product along your upper waterline.
- Work in small sections, moving from the outer corner inward.
- Be careful not to poke your eye – if you feel uncomfortable, take breaks as needed.
This technique fills in any gaps between your lashes, creating a more cohesive and polished look.
Creating a Smudged Effect
For a true smokey effect, you’ll want to smudge your eyeliner slightly. This creates a soft, sultry look that blends seamlessly with your eyeshadow.
- Apply your eyeliner along your upper lash line, staying as close to the lashes as possible.
- Using a smudge brush or a cotton swab, gently smudge the line upwards and outwards.
- Work quickly before the eyeliner sets to achieve the best smudged effect.
- Blend the smudged liner into your eyeshadow for a cohesive look.
Remember, the goal is to create a soft, diffused line rather than a sharp, defined one.
Lash Enhancement
No smokey eye is complete without lush, voluminous lashes. Enhancing your lashes can make your eyes appear larger and more dramatic, perfectly complementing your smokey eye makeup.
Curling Your Lashes
Before applying mascara, curling your lashes can make a significant difference in opening up your eyes.
- Position the curler at the base of your upper lashes, being careful not to pinch your skin.
- Gently squeeze the curler and hold for 10-15 seconds.
- Release and move the curler slightly outward, repeating the process.
- Finish by curling the tips of your lashes for a natural-looking curl.
For best results, warm your eyelash curler with a hair dryer for a few seconds before use (test the temperature on your hand first to avoid burning your eyelids).
Mascara Application Techniques
Proper mascara application can take your lashes from ordinary to extraordinary. Here are some tips for achieving voluminous, defined lashes:
- Start with the wand at the base of your lashes and wiggle it slightly as you move upwards.
- Apply multiple thin coats rather than one thick coat for a more natural look.
- Use the tip of the wand to coat smaller lashes in the inner and outer corners.
- For extra volume, apply mascara to both the top and bottom of your upper lashes.
Don’t forget your lower lashes – a light coat can help balance out your eye makeup.
Applying False Lashes (Optional)
For an extra dramatic effect, consider adding false lashes to your smokey eye look.
- Trim the lash band to fit your eye shape if necessary.
- Apply a thin line of lash glue to the band and wait 30 seconds for it to become tacky.
- Using tweezers or a lash applicator, place the lashes as close to your natural lash line as possible.
- Press gently along the band to secure the lashes in place.
- Once dry, apply a coat of mascara to blend your natural lashes with the falsies.
With practice, applying false lashes can become a quick and easy way to elevate your smokey eye look.
Lower Lash Line
While much of the focus in a smokey eye look is on the upper lid, don’t neglect your lower lash line. Adding definition and color to this area can balance out your makeup and create a more cohesive look.
Smudging Eyeshadow
To create a soft, smokey effect on your lower lash line:
- Choose a darker shade from your eyeshadow palette.
- Using a small pencil brush, apply the shadow close to your lower lashes.
- Start from the outer corner and work your way inward, stopping about halfway.
- Use a clean blending brush to soften and diffuse the color.
Remember to keep the intensity of the lower lash line balanced with the upper lid – you typically want it to be slightly less dramatic.
Waterline Application
Adding eyeliner to your waterline can intensify your smokey eye and make your lashes appear fuller.
- Choose a waterproof pencil eyeliner in black or dark brown.
- Gently pull down your lower eyelid to expose the waterline.
- Carefully apply the liner along the waterline, working from the outer corner inward.
- For a softer look, use a nude or white liner on the waterline instead.
Be gentle when applying liner to your waterline, and never share eye products to avoid potential infections.
Connecting Upper and Lower Makeup
To create a cohesive smokey eye look, it’s important to connect your upper and lower eye makeup.
- Use your darkest eyeshadow shade on a small brush.
- Apply this color to the outer corner of your eye, blending it slightly upward and outward.
- Connect this color with the shadow on your lower lash line, creating a V-shape at the outer corner.
- Blend well to avoid any harsh lines.
This technique helps to frame your eyes and completes the smokey effect.
Highlighting and Brightening
Adding highlights to your smokey eye can brighten your look and make your eyes appear larger and more awake. Let’s explore some techniques for incorporating highlights into your makeup.
Brow Bone Highlight
A subtle highlight under your brow can lift and define your eye area.
- Choose a light, shimmery eyeshadow or a dedicated highlighter.
- Using a small, flat brush, apply the highlight directly under your eyebrow.
- Focus on the arch of your brow for the most flattering effect.
- Blend well to avoid a stark line of shimmer.
Be careful not to overdo it – a little highlight goes a long way!
Inner Corner Brightness
Brightening the inner corner of your eye can make your eyes look wider and more awake.
- Select a light, shimmery shade that complements your skin tone.
- Using a small, precise brush, apply the highlight to the inner corner of your eye.
- Blend slightly onto the inner part of your lower lash line and the inner portion of your lid.
- For a more dramatic effect, use a metallic or glittery shade.
This technique is especially effective for making small eyes appear larger.
Balancing Matte and Shimmer
While a classic smokey eye is often matte, incorporating some shimmer can add dimension to your look.
- Use matte shades for your crease and outer corner to create depth.
- Apply a shimmery or metallic shade to the center of your lid for a pop of light.
- Keep shimmer away from areas with fine lines or texture to avoid emphasizing them.
- Blend well where matte and shimmer shades meet for a seamless transition.
Remember, the key is balance – too much shimmer can detract from the sultry effect of a smokey eye.
Finishing Touches
As we near the end of our smokey eye journey, it’s time to add those final touches that will elevate your look from great to absolutely stunning. These last steps will ensure your makeup stays put and looks flawless all day or night.
Setting Your Makeup
To prevent creasing and extend the wear of your smokey eye, it’s crucial to set your makeup properly.
- Choose a translucent setting powder or a finely milled eyeshadow in a shade close to your skin tone.
- Using a small, fluffy brush, lightly dust the powder over your entire eye area.
- Pay special attention to areas prone to creasing, like the crease of your eyelid and under your eyes.
- Be careful not to apply too much powder, as this can make your makeup look cakey.
For an extra long-lasting effect, you can use a setting spray designed specifically for eye makeup.
Cleaning Up Fall-Out
Even with the most careful application, you might end up with some eyeshadow fall-out under your eyes. Here’s how to clean it up without ruining the rest of your makeup:
- Wait until your eye makeup is completely finished before addressing fall-out.
- Use a clean, fluffy brush to gently sweep away any loose eyeshadow particles.
- For stubborn fall-out, use a cotton swab dipped in micellar water or makeup remover.
- Carefully dab at the fall-out, being careful not to smudge your under-eye concealer.
- If necessary, touch up your concealer in the areas where you removed fall-out.
Final Touch-Ups
Before you declare your smokey eye complete, take a step back and assess your work. This is your chance to make any final adjustments:
- Check that both eyes are balanced and symmetrical.
- If one eye looks darker than the other, lightly blend out the darker eye with a clean brush.
- Add a bit more highlight to your brow bone or inner corner if needed.
- Touch up your eyeliner if it has smudged or faded during the application process.
- Apply an extra coat of mascara if you want more drama.
Remember, makeup is an art, not a science. Don’t stress if your smokey eyes aren’t perfectly identical – slight variations can add character and charm to your look.
Complementary Face Makeup
While the smokey eye is undoubtedly the star of the show, it’s important to consider how the rest of your makeup will complement this bold eye look. Let’s explore how to balance your face makeup to create a cohesive and stunning overall appearance.
Choosing the Right Foundation
When wearing a smokey eye, you want your skin to look flawless without overshadowing your eye makeup. Here are some tips for selecting and applying foundation:
- Opt for a medium-coverage foundation that gives a natural, skin-like finish.
- Apply foundation with a damp beauty sponge for a seamless blend.
- Focus on evening out your skin tone rather than masking every imperfection.
- Set your foundation with a light dusting of translucent powder to prevent shine.
Remember, the goal is to create a smooth canvas that allows your smokey eye to take center stage.
Contouring and Highlighting
Subtle contouring can add dimension to your face and complement your smokey eye:
- Choose a contour shade that’s only 1-2 shades darker than your natural skin tone.
- Apply contour to the hollows of your cheeks, along your jawline, and on the sides of your nose.
- Blend thoroughly for a natural-looking shadow effect.
- Add a touch of highlighter to the high points of your face – cheekbones, bridge of nose, and cupid’s bow.
Keep your contour and highlight subtle to avoid competing with your eye makeup.
Blush Application
A touch of blush can add life to your complexion and tie your whole look together:
- Choose a blush color that complements your skin tone and the overall color scheme of your makeup.
- For a classic look, opt for a soft pink or peach shade.
- Apply blush to the apples of your cheeks, blending upwards towards your temples.
- Use a light hand – you want a natural-looking flush, not a bold pop of color.
Remember, when wearing a smokey eye, it’s best to keep the rest of your makeup relatively understated.
Lip Color Selection
Choosing the right lip color is crucial when wearing a smokey eye. The goal is to complement your eye makeup without overwhelming your overall look. Here are some tips for selecting the perfect lip color:
Nude Lips
A nude lip is a classic choice that allows your smokey eye to remain the focal point of your makeup:
- Choose a nude shade that’s close to your natural lip color or slightly darker.
- For a polished look, line your lips with a nude lip liner before applying lipstick.
- Opt for a satin or cream finish rather than a matte to avoid looking washed out.
- If your chosen nude is very light, add a touch of gloss to the center of your lips for dimension.
Remember, the perfect nude will vary depending on your skin tone – what looks natural on one person might appear too light or dark on another.
Bold Lip Options
If you’re feeling daring, you can pair your smokey eye with a bold lip color:
- Deep reds or burgundies can create a sultry, vampy look.
- For a modern twist, try a deep plum or berry shade.
- If opting for a bold lip, keep the rest of your makeup minimal to avoid looking overdone.
- Apply bold colors with a lip brush for precision and clean edges.
When wearing a bold lip with a smokey eye, make sure the undertones of your lip color complement the shades in your eye makeup.
Balancing Finishes
The finish of your lip product can affect the overall balance of your makeup:
- If your smokey eye is very shimmery or metallic, opt for a matte or satin lip color.
- For a matte smokey eye, a glossy lip can add a beautiful contrast.
- If you’re wearing false lashes or dramatic eyeliner, a subtle lip gloss can add just the right amount of shine without competing for attention.
Remember, makeup is all about balance – play around with different combinations to find what works best for you!
Maintaining Your Smokey Eye
Creating a beautiful smokey eye is only half the battle – keeping it looking fresh throughout the day or night is equally important. Here are some tips to help your smokey eye makeup last longer and look great for hours.
Touch-Up Kit Essentials
Prepare a small touch-up kit to carry with you for quick fixes:
- Cotton swabs for cleaning up smudges
- A small eyeshadow brush for blending
- Your main eyeshadow shade for touch-ups
- A travel-sized mascara
- Blotting papers to control shine without disturbing your makeup
Having these items on hand will allow you to maintain your smokey eye look no matter where you are.
Preventing Creasing
Eyeshadow creasing can ruin even the most beautifully applied smokey eye. Here’s how to prevent it:
- Always start with an eye primer to create a smooth base.
- Set your eye primer with a translucent powder before applying eyeshadow.
- Apply eyeshadow in thin layers, building up intensity gradually.
- Avoid applying too much product to your mobile lid, where creasing is most likely to occur.
- If you have oily lids, carry oil-absorbing sheets to blot your lids throughout the day.
Refreshing Your Look
If your smokey eye starts to look tired or faded, here’s how to refresh it:
- Use a clean blending brush to re-blend any harsh lines that may have formed.
- Add a touch more of your darkest shade to the outer corner to intensify the smokey effect.
- Reapply highlighter to your inner corner and brow bone to brighten your eyes.
- Touch up your eyeliner, focusing on areas where it may have smudged or faded.
- Apply a fresh coat of mascara to revive your lashes.
Remember, less is more when it comes to touch-ups. It’s better to make small adjustments than to completely reapply your makeup.
Removing Your Smokey Eye
After a long day or night of rocking your smokey eye, it’s crucial to remove your makeup properly. Thorough removal not only keeps your skin healthy but also prevents staining your pillowcases and waking up with panda eyes!
Choosing the Right Makeup Remover
Different types of makeup removers work best for different skin types and makeup formulas:
- Oil-based removers: Great for waterproof and long-wearing makeup
- Micellar water: Gentle and effective for most makeup types
- Cleansing balms: Luxurious and thorough, especially good for dry skin
- Makeup wipes: Convenient for travel, but not as thorough as liquid removers
Choose a remover that effectively dissolves your makeup without irritating your eyes or skin.
Gentle Removal Techniques
Be gentle when removing eye makeup to avoid damaging the delicate skin around your eyes:
- Soak a cotton pad with your chosen remover.
- Press the pad gently against your closed eye for about 10 seconds to allow the product to break down your makeup.
- Gently swipe the pad across your eye, moving from the inner corner outward.
- For stubborn mascara, hold a soaked cotton pad against your lashes and gently massage.
- Use a fresh cotton pad for each eye to avoid spreading bacteria.
Never rub or tug at your eyes, as this can cause irritation and premature aging.
Double Cleansing Method
For a thorough cleanse, especially after wearing heavy makeup, consider the double cleansing method:
- Start with an oil-based cleanser or micellar water to remove makeup and sunscreen.
- Follow up with a water-based cleanser to clean your skin and remove any remaining residue.
- Rinse thoroughly with lukewarm water.
- Pat your face dry with a clean towel.
This method ensures that all traces of makeup are removed, leaving your skin clean and ready for your skincare routine.
By following these steps, you’ll not only perfect your smokey eye application but also ensure that your skin stays healthy and radiant. Remember, practice makes perfect, so don’t be discouraged if your first attempts aren’t flawless. With time and patience, you’ll be creating stunning smokey eye looks like a pro!